
Hello Cloud Marathoners,
In my last posts, I wrote about Azure CL and a Bicep language. The Azure Bicep language, helps to author and manage Azure resources more cleanly and easily on your Azure subscription.
The parameterization of infrastructure deployment files is an important skill where true power of automation and code reuse comes forward.
Let’s learn about different parameterization options that you could use in your Azure Bicep deployments. As an example, we will examine the following parameterization options on an Azure Bicep web app deployment file.
✔️ Using Bicep file as is
✔️ Using default parameters on your bicep file
✔️ Simply adding parameters into your command line
✔️ Using a separate file for parameters, per environment
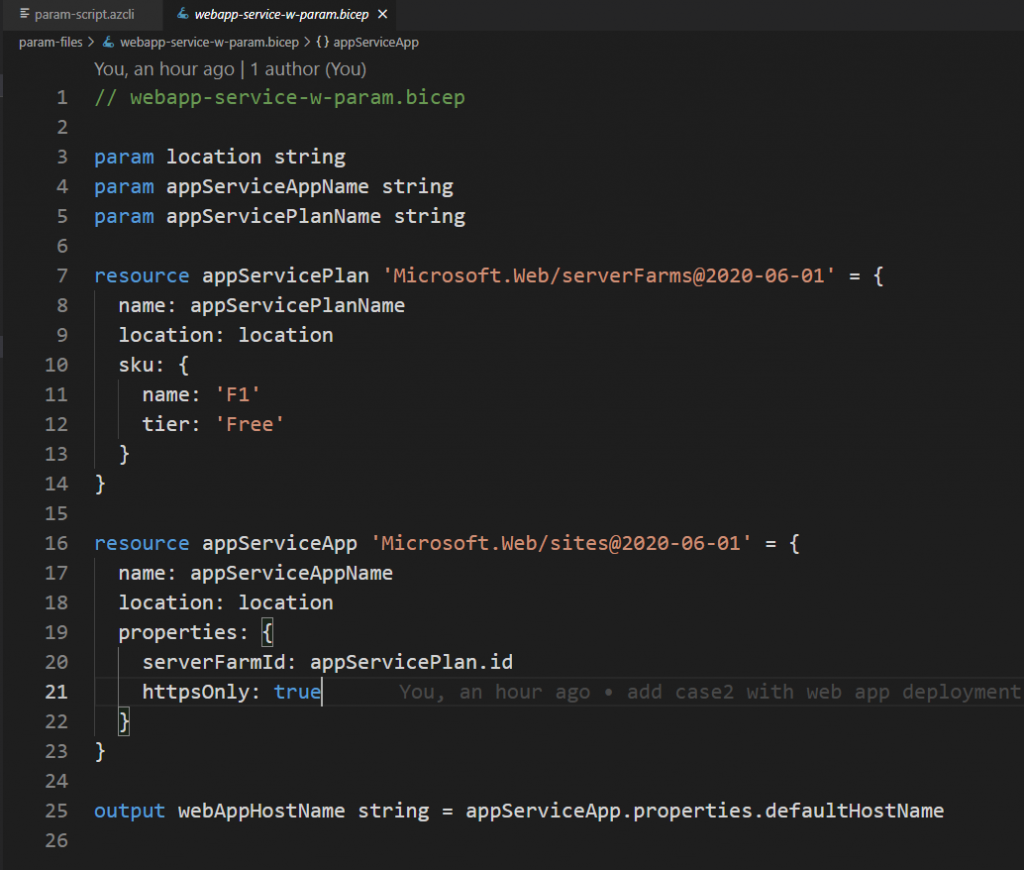
Option 1: Using Bicep file as is
This first option is the most straightforward way to declare your parameters. However, you would have to enter each parameter name, every time you are deploying the Azure resources.
Following screenshot is a default Bicep web app declaration with parameters. Check the Learn Bicep repo here 👍
Now, let’s declare an Azure CLI command that will deploy our Azure Bicep file into a Resource group.
# Create a rg-test-deploy RG
az group create -l eastus -g 'rg-test-deploy'
# Option-1: Run deployment file as is
az deployment group create -g 'rg-test-deploy' -f .\param-files\webapp-service-w-param.bicep
# List all webapps in the subscription
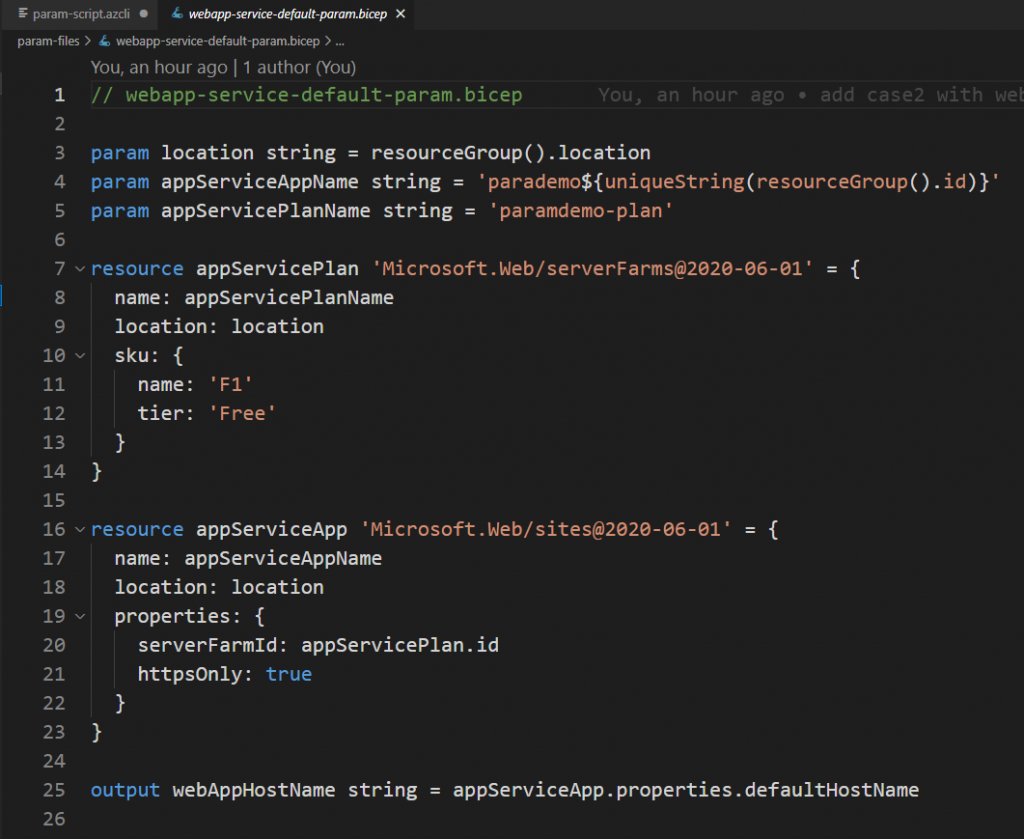
az webapp list --query [].name -o tableOption 2: Using default parameters on your bicep files
The second option will allow us to deploy our Bicep file without entering the default values each time. However, it would require an update on file each time you want to change parameter values 😢
Now, we can take the previous webapp-service Bicep file, and add its default values. The updated Bicep file will look like the following screenshot:
Our Azure CLI deployment script would just get a new file name
# Option-2: Run deployment with default values
az deployment group create -g 'rg-test-deploy' -f .\param-files\webapp-service-default-param.bicep

# You could also add preflight check with "-c" at the end of each deployment script
Option 3: Simply adding parameters into your command line script
If you would prefer to type parameters and values on a terminal then third option can deliver it for you. That script will look like the following sample:
# Option-3: Run deployment with inline parameters
az deployment group create -g 'rg-test-deploy' -f .\param-files\webapp-service-w-param.bicep -p location='eastus' appServiceAppName='param-demoapp18' appServicePlanName='asp-param-demo'
Option 4: Using a separate file for parameters, per environment
The last option has multiple advantages over prior options. As you could create separate environment parameters in their own dedicated files and manage them accordingly.
For example: You can create a separate param file for “Dev” environment deployments; like in the following screenshot.
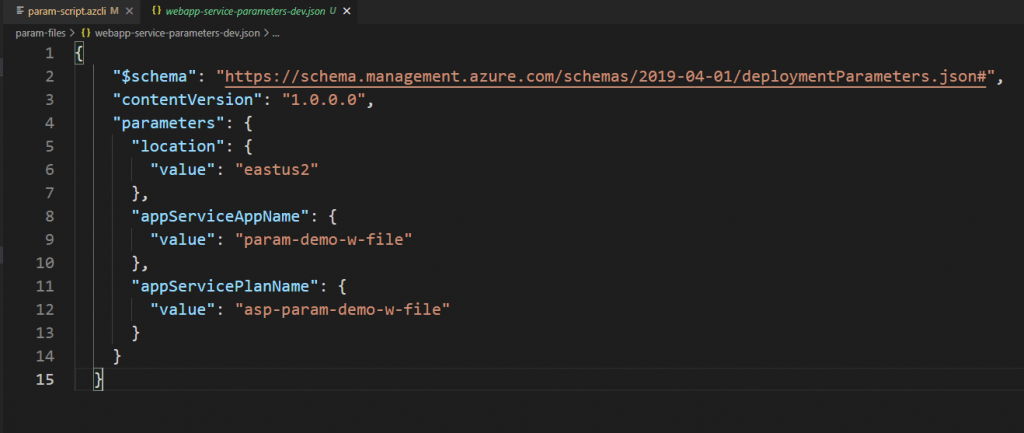
Note: parameter files for Bicep language are using a JSON notation, similar to the way how ARM JSON declares parameter files with a following schema.
"https://schema.management.azure.com/schemas/2019-04-01/deploymentParameters.json#"And our deployment script will look like the following sample:
# Option-4: Run deployment with a separate parameter file
az deployment group create -g 'rg-test-deploy' -f .\param-files\webapp-service-w-param.bicep -p .\param-files\webapp-service-parameters-dev.json

# List all webapps in the subscription
az webapp list --query [].name -o table

# Clean all resources from RG
az group delete -n 'rg-test-deploy' --yes
Summary
Thank you 🙏 for reading this post and learning about four different options to deploy your Azure Bicep files using Azure CLI.
Please check out the Learn Bicep GitHub repo, and follow it.
Thanks 🙏 🙌 !
Stay tuned for more Azure automation & Azure Bicep posts.
Fᴏʟʟᴏᴡ ᴍᴇ 🎯 ᴀɴᴅ become ᴀ #cloudmarathoner ⛅🏃♂️🏃♀️ – 𝐋𝐄𝐓’𝐒 𝐂𝐎𝐍𝐍𝐄𝐂𝐓 👍
![]()